One of the top DAW’s for sound design is Reason 12, and also its Reason Rack VST. Since selling sound kits and sample packs is one of the best revenue streams out there for musicians, I wanted to showcase some creative sound design tips Reason enables from sound designers. No need to recycle sounds. Here are 10 Reason 12 Sound Design Tips.
Added Realism For Drums With Kong Drum Designer
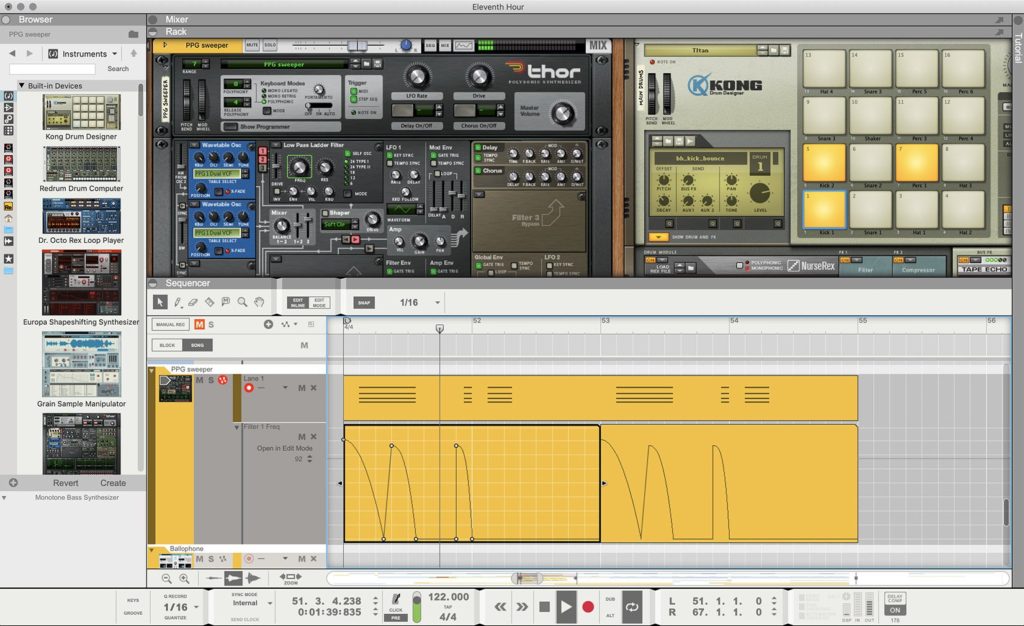
Reason’s Kong Drum Designer includes some amazing physical modeling tools for making your own drum sound. Within the drum module, you can begin with its “Physical Bass Drum” preset and tweak it to your liking. I like to add the “Rattler” for a bit of airiness as well along with the compressor for some snap.
To add some weight to your drum sound, you can add a synthetic layer with Europa. I like to use a sine wave with a pitch envelope, and then add some additional heat from a Pulverizer. Now you have some some nice and punchy kick drums that aren’t your boring generic synth drums.
Vocal Chops With Kong Drum Designer
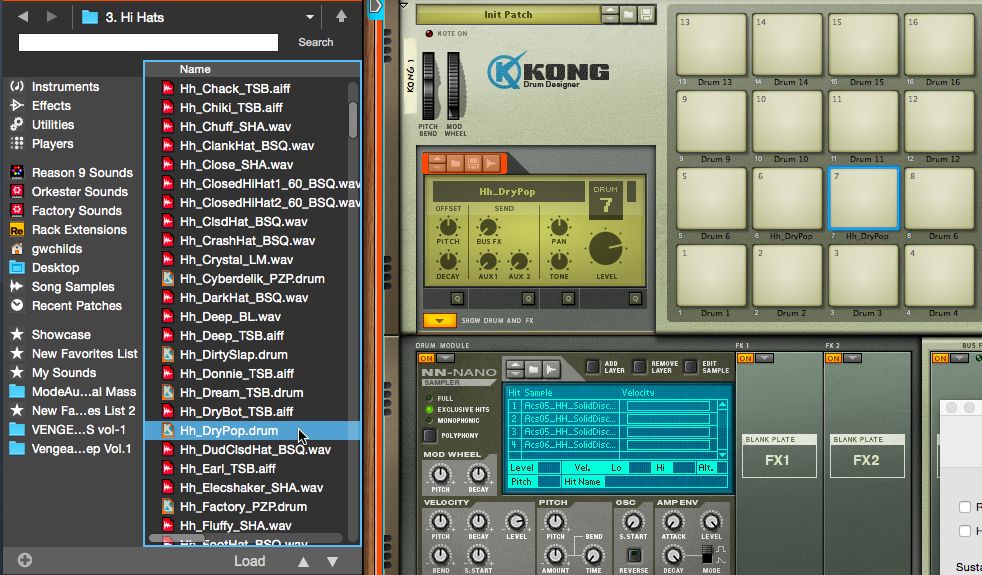
One creative sound design idea that I think is overlooked is to not only leverage Kong as a drum sampler and designer, but also as a vocal chop sampler. And it’s great if you’re familiar with the MPC style workflow.
This is great for that kind of like MPC style workflow. This does take a little bit of setup with loading your chops with the NN-Nano Sampler. But after loading them in, you can go to the Amp Envelope section, and drop the decay to zero and set the mode to gate. Then you can go to the Pad Group with the quick mode and mute them all with A. What this will do, is turn Kong into a monophonic vocal slice playback machine.
To finish these off here, I added Neptune to tune them up, Echo for some nice, saturated delay and an RV7000 for some nice reverb. And then you have some interesting vocal chops to play with.
Building a custom Vinyl Crackle with Thor Polyphonic Synthesizer
I’m a really big fan of noise and texture in my music and in my sounds and in my mixes. And one of the cool things within Thor is the noise oscillator. To create a custom vinyl crackIe using Thor is to define three different noise oscillators. First, on the static, where you can adjust the density. Secondly, on the color to balance that to find some nice lo-fi mechanical noise. And finally, sample and hold and just adjust the rate to your liking. Then, run that through a shaper and set the amplitude envelope to be fully sustained. That way you can hold it down and sample out some vinyl crackle. To get the tone right, add a pulverizer, some EQ and a RV7000 with the space echo preset. All together we took some basic noise and turned it into some pretty convincing vinyl crackle. Just one of the ways to innovate with Reason 12 sound design.
Layering madness with the NN-XT Sampler
Another really fun tool is the NN-XT Sampler, that has been around since the early instances of Reason. This is not only good for the default presets in it, but also good for layering and manipulating sounds. Try layering up a kick with some percussion, and then adjust the amp envelope of each of these, the filter on each layer and the pitch. Next, add in a Scream 4, a Pulverizer and an RV7000 with the spring reverb. This took a kick drum and some basic percussion and turned it into a pretty cool kind of low-fi clunky rim shot. NN-XT is a lot of fun to experiment with for sound design in Reason. If you turn off the high quality mode as well, you can get some gritty textures out of things, especially as you get into extreme pitch manipulation.
Granular chorus for stereo width
The quartet chorus ensemble is probably one of my favorite chorus effects. It sounds fantastic. One of the things I use quite a bit is the grain mode by adjusting the jitter density and size, and then just upping the width to taste and blending in the dry wet. You can take a dry percussion sound and add an interesting feel to it and also enhance the stereo image of it. And then you can feed that into a reverb to tie it all together. Then you get a nice wide snare sound from a very dry static sound.
Vocoding sound with itself
One of my favorite techniques for designing percussion is to use the BV512 vocoder in combination with the merger and splitter. What you can do is, send the left signal into the merger and splitter and run the left signal to both the carrier left and right inputs. Then run the right output into the modulator input. This means that the sound is vocoding itself. This is awesome because it gets you some interesting characters here to color your sound. If you take a traditional snare and turn this on and run it through the vocoder on 32 band mode, while adjusting the formants, high-frequency emphasis and the decay. Overall, it’s a great trick to make percussion sound more interesting.
Epic pads made easy with Players
One really great way to create some epic sounding pads and textures is to utilize the players built into Reason. I’ve got a Quad Note Generator here on C minor pentatonic. That’s running into a Dual Arpeggio with the Backbone FP preset. I’ve got that feeding into a Europa, which has a pluck preset on. I only changed the octaves to tase. And then two Malstrom Synthesizer’s to add a pad behind that. Now the starting sound out of all of that is interesting already, but what I like to do is let that run for a bar or two and then resample it into a Grain. Once you’ve got your resampled sound dragged into a Grain, you can just alter this to your liking. I like to slow it down, add some jitter, and increase the panning spread. Then you can feed that into the film score preset of the RV7000 and add an EQ to cut out the lows and the highs. This turns what was already a cool pad into it an epic, cinematic, droning, granular texture.
Unique sounds with convolution
As you may or may not know, RV7000 is a convolution reverb. With the default Kong kit feeding into the plate reverb, you can drag in any other sound to be an impulse response. This is one of my favorite sound design techniques to just get some wacky interesting sounds out of stuff.
Formant shifting any sound with Neptune
With Neptune, you cancontrol the formant of any sound, and not just for vocals. For example, with a percussion loop loaded up here, you can turn the MIDI to the voice synth and disable that by dropping the voice synth level down to zero we’ll turn off transpose and pitch adjust, enable the formants and then dial it in and out to taste. This is a really great way to manipulate a sound in an interesting fashion, to get a different character and tambour out of it. You can almost make things a bit more lo-fi or make them a bit more bright, which is a cool way to transform some loops and other sounds that you’ve used a bunch or to make something a bit more unique.
Trust in the legendary combinator for Reason 12 sound design
One last tip is don’t forget about Combinator. Now, for those of you that are familiar with Reason, this might seem super obvious, but for those of you that are newer, or maybe just got into the Reason Rack VST, the Combinator is one of the most powerful things out there within this. Cominator is extremely powerful and a lot of fun because it opens up just about any different control and any parameter of anything that you want to mess with. So definitely don’t sleep on that and forget it’s there, especially for sound design purposes. If there’s ever a parameter, you wish you could modulate or tweak The Combinator is your way to go.
So, there are 10 Reason 12 Sound Design tips. If you want to start profiting on selling your own sound kits and sample packs, use these techniques and tips to build you own unique sound from scratch.
And did you know that there are many open opportunities for sound designers? If you are currently searching for a job, consider checking out the job opportunities for sound designers.
